Daylily Propagation by Seed
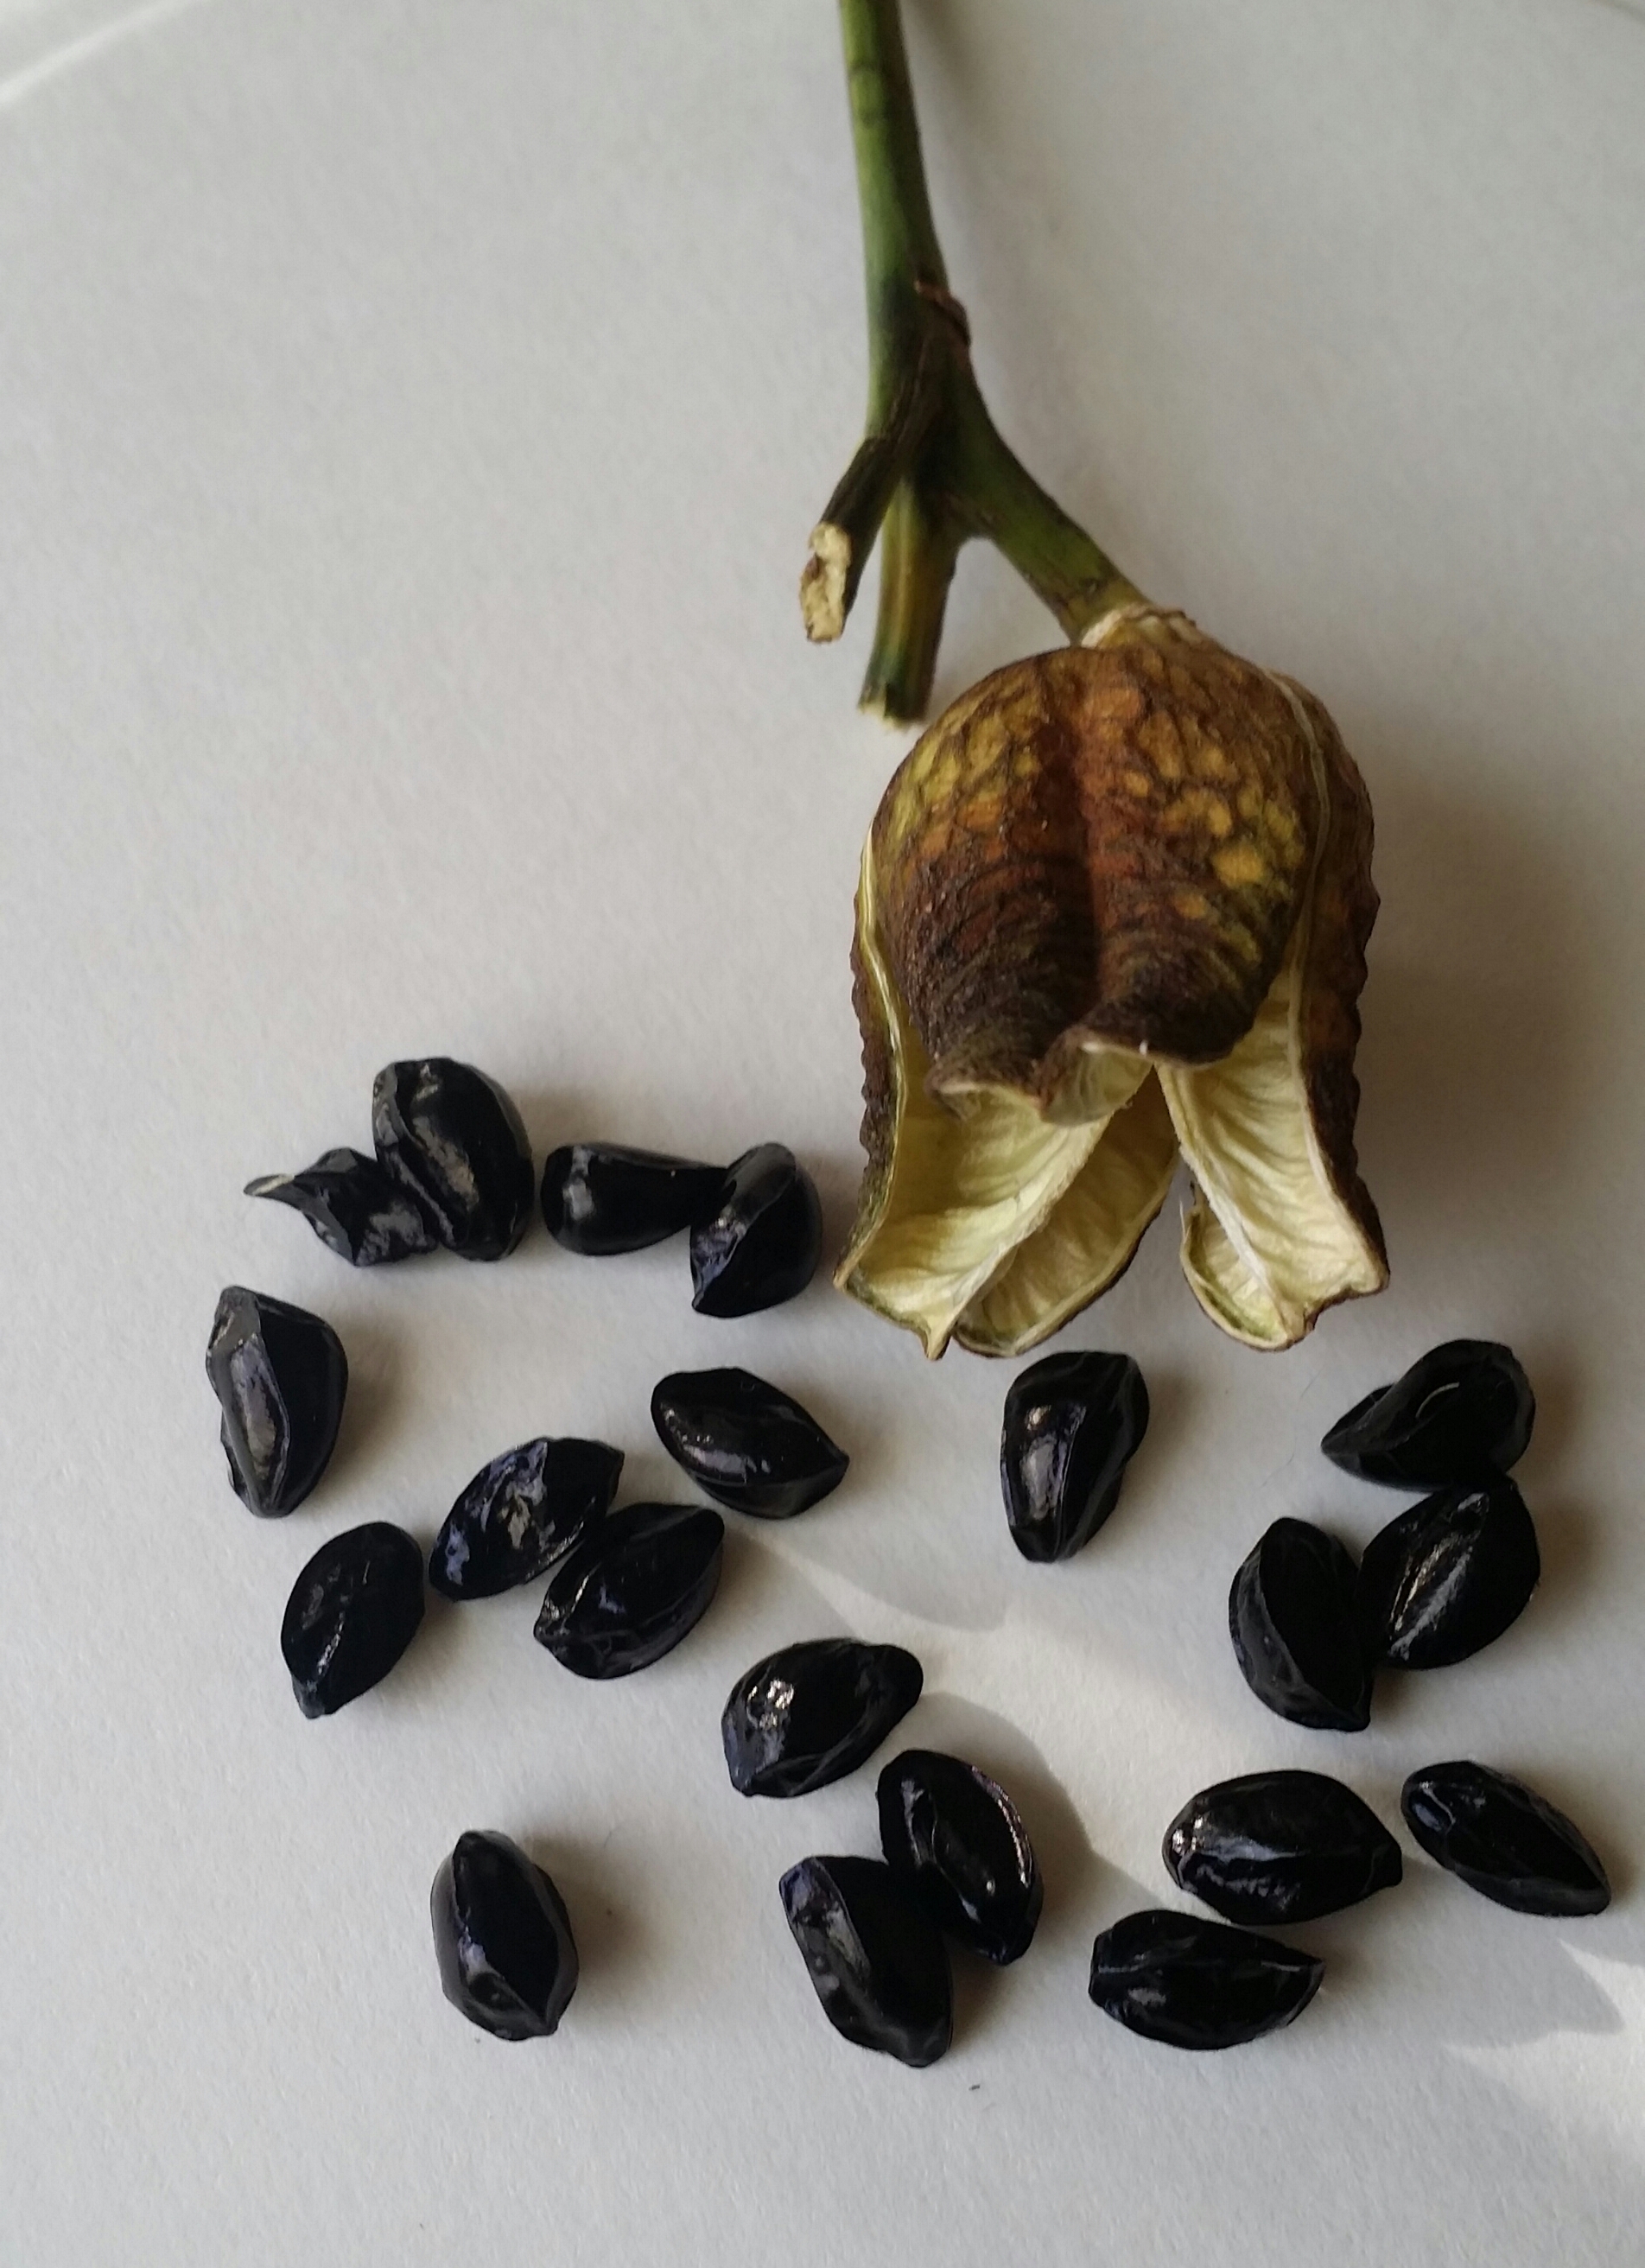
Seed Pod and Seeds
Ways to get more Daylilies: physical division of plants, seed production and proliferation shoots. Seed propagation is discussed in this post.
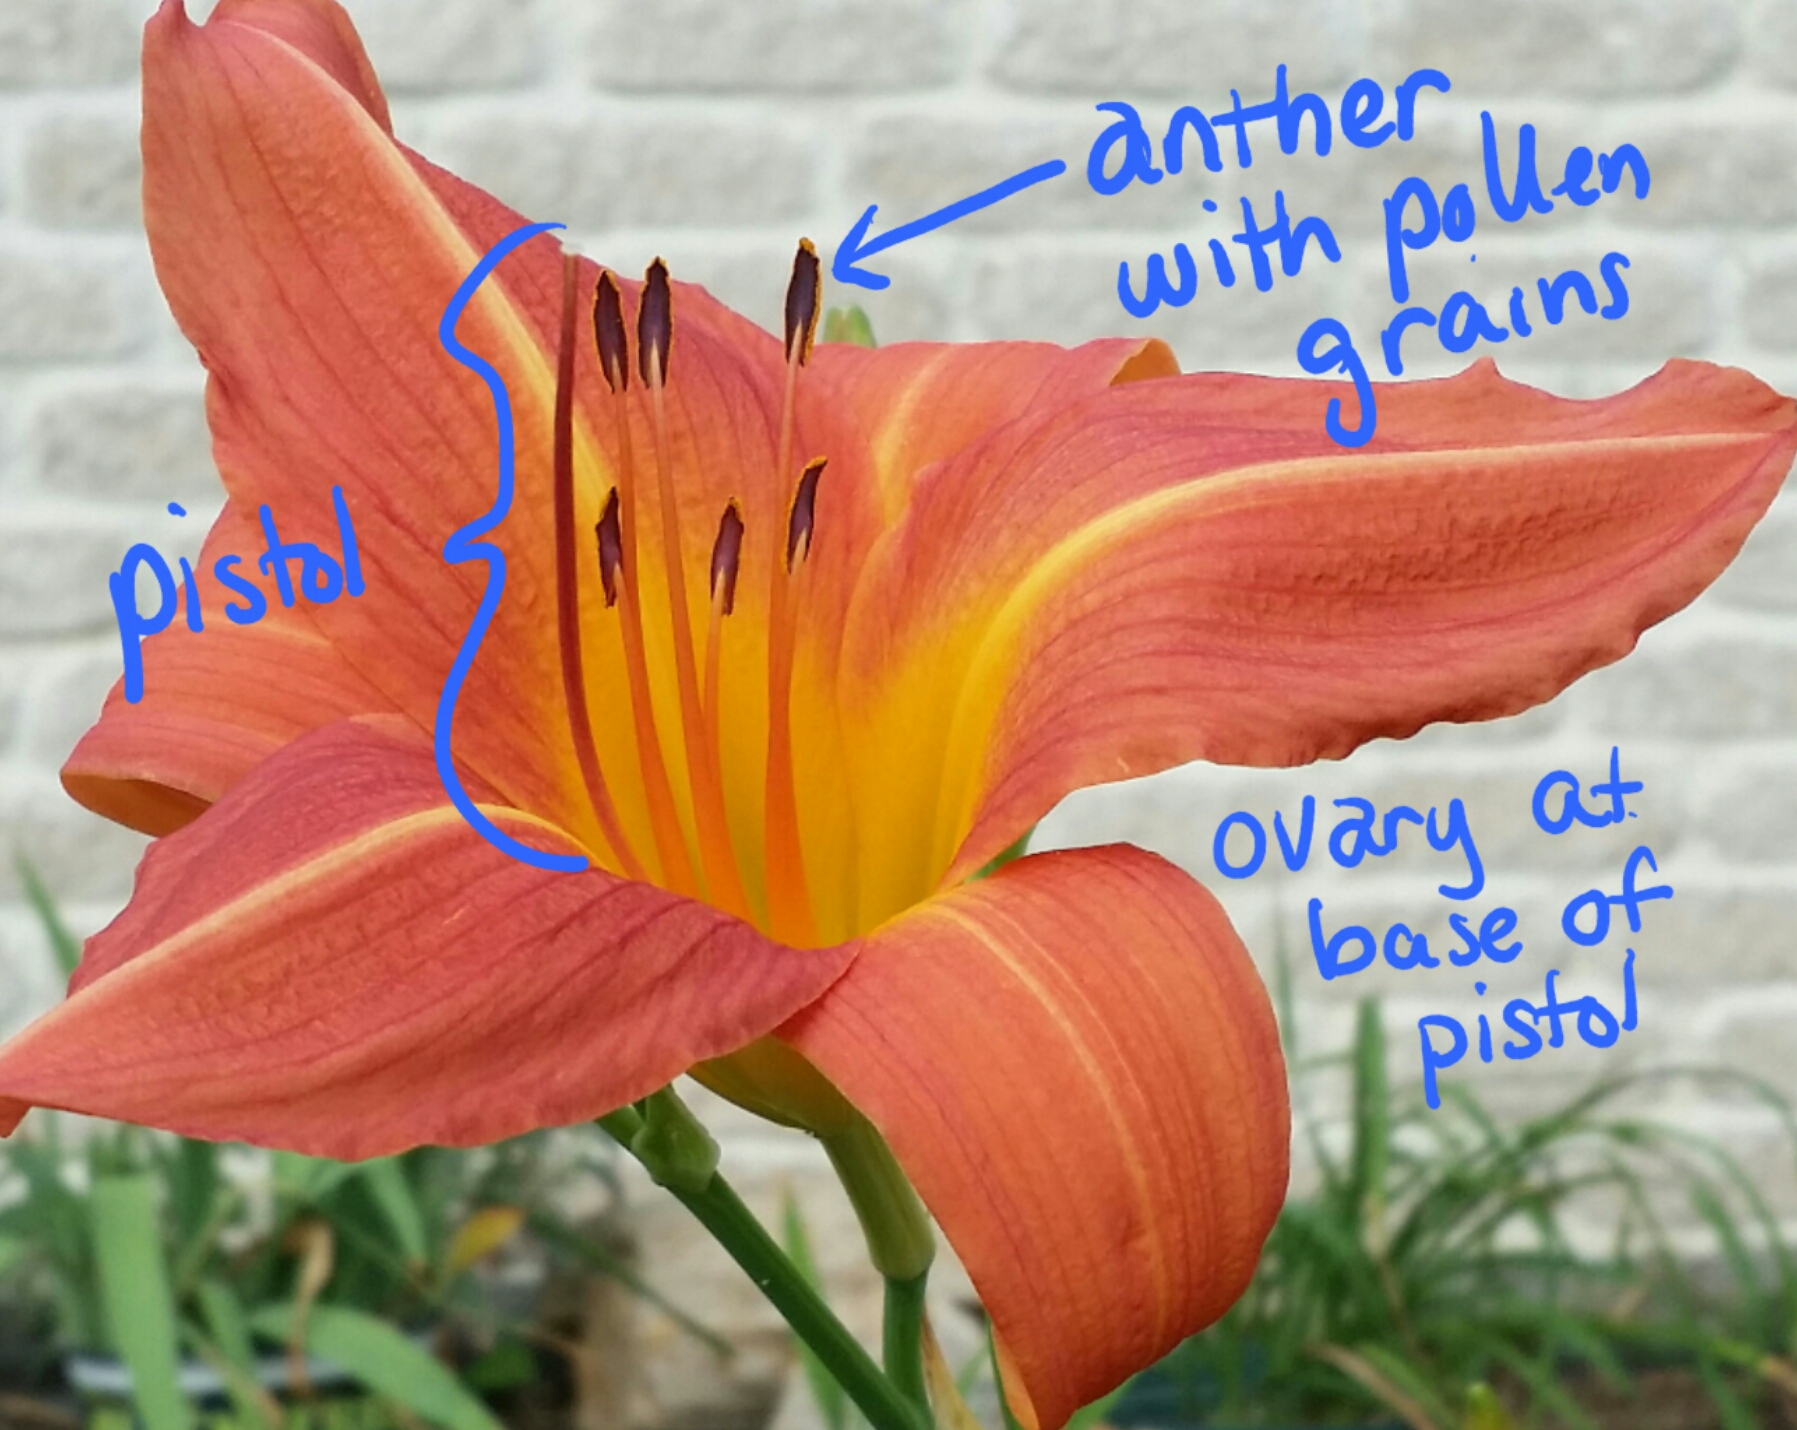
Seed Producing Parts
Pollination.
Daylilies have both the pollen and the ovary on a single plant (called monoecious, or “one house” for both components).
So, there are two ways to make daylily seeds; 1) self-pollination (pollen and plant ovule on the same flower or plant) and 2) cross pollination (pollen from one plant, ovule from another).
Interestingly, even those seeds resulting from self-pollination often result in genetic variations of the parent (and therefore, slightly to significantly different plants). Some traits may be magnified — and those can be either desirable or undesirable. If the existing plant is the desired plant, do not use seed propagation—rather, use one of the other two methods (physical division or proliferation shoots).

Self-Pollination
Pollination can be accomplished by removing one of the anthers with pollen and dusting the top of the pistol I usually just pinch off a stamen (contains an anther with pollen grains) and use it like a paint brush.
Note: on this flower, the pollen is yellow., The pistol appears like a stamen without anther and pollen. (See Self-Pollination picture, left.)
There are two possible problems. First, while seed pods begin to form quite readily after pollination, they are not always viable, and the seeds will not mature. Second, when cross-pollinating, the plants may not be compatible; newer daylilies are often genetically tetraploids while older dayliles are diploids–genetic inconsistency results in no seed production. [Note: diploid daylilies have 22 chromosomes and tetraploid daylilies have 44 chromosomes.]
Watch the Seed Pods.
Finally, if new varieties sound interesting and seed pods grow, keep an eye on them or they will fling seeds out into the environment when they open. In the series below, an open seed pod with only 2 seeds remaining is on the left, while the seed pod just starting to open is on the right. When the seed pods show initial cracking and opening, clip them off the scape and put in an open container to allow them to dry and open—revealing the seeds (as shown at the very top picture).
-
- Opened Seed Pod with Loss of Seeds
-

- Seed Pod Cracking


Pingback: Daylily Propagation by Proliferation | The Art & Science of Gardening