Dividing Daylilies (Part 2)
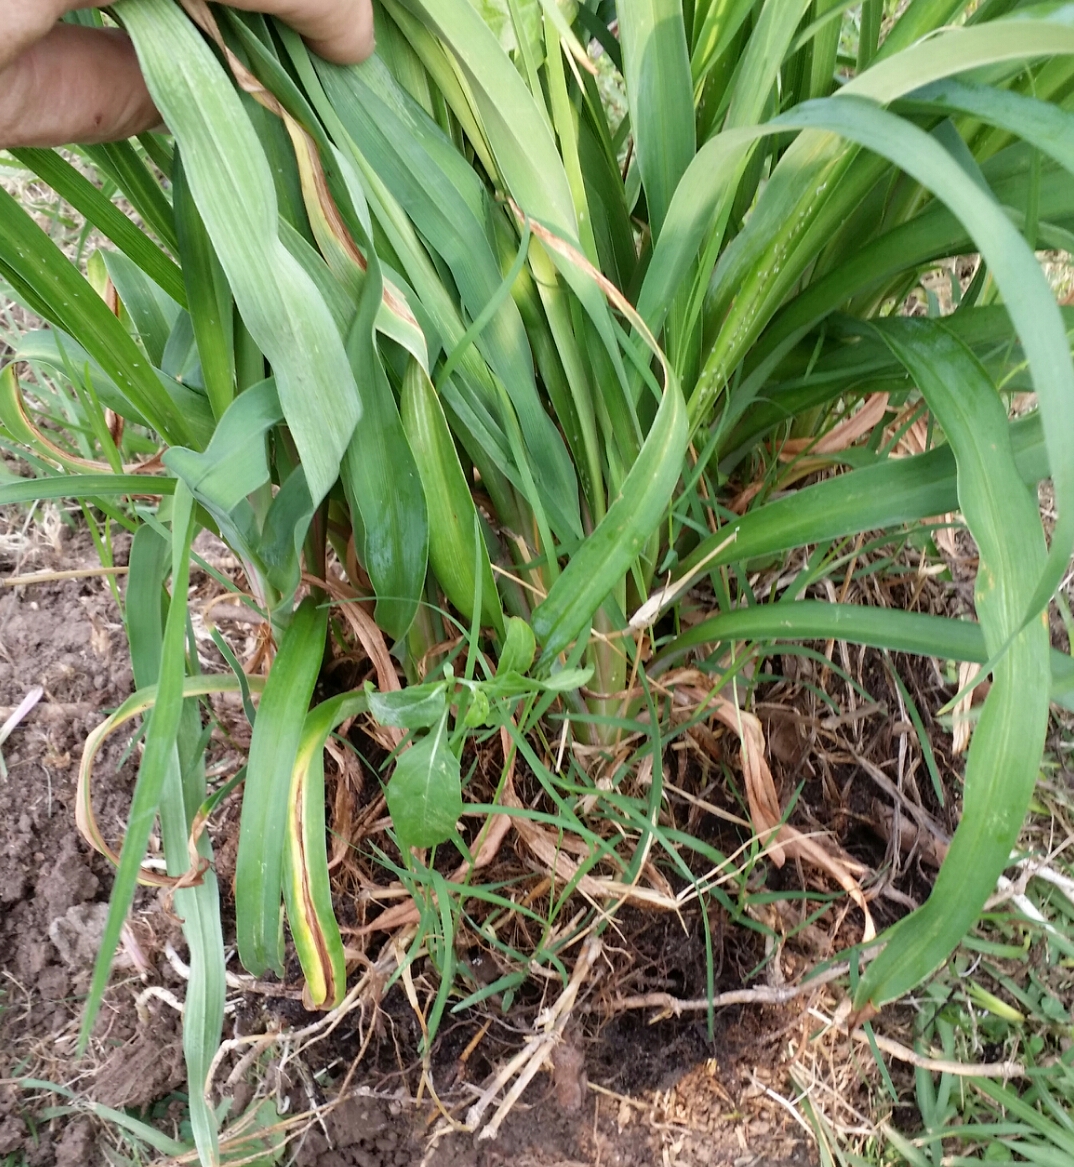
Clump of Daylilies
After preparing new bed space (Part 1), Here’s how I divided the daylilies, beginning with one Clump of Daylilies (see photo, left). this clump was dug with a hand spade; this clump has quite a bit of bermuda grass and weeds woven throughout the daylily roots–those can be removed as the clump is divided into single plants (also called “fans”).
Over time, grass, sedge, and other undesired plants will happily find a new home with the daylily root system. Removing grass and weeds removes competition for nutrients and space in the soil. Before I divided the dayliles (and physically removed all obvious weeds and grass, several of my daylily varieties stopped blooming–I’ve recently discovered two varieties as they are now blooming. Do not underestimate the competition that grasses and weeds will inflict on daylilies. (There are also herbicides to remedy the bermuda grass and other weeds, just check with your local county extension agent to learn more about those chemical controls.)
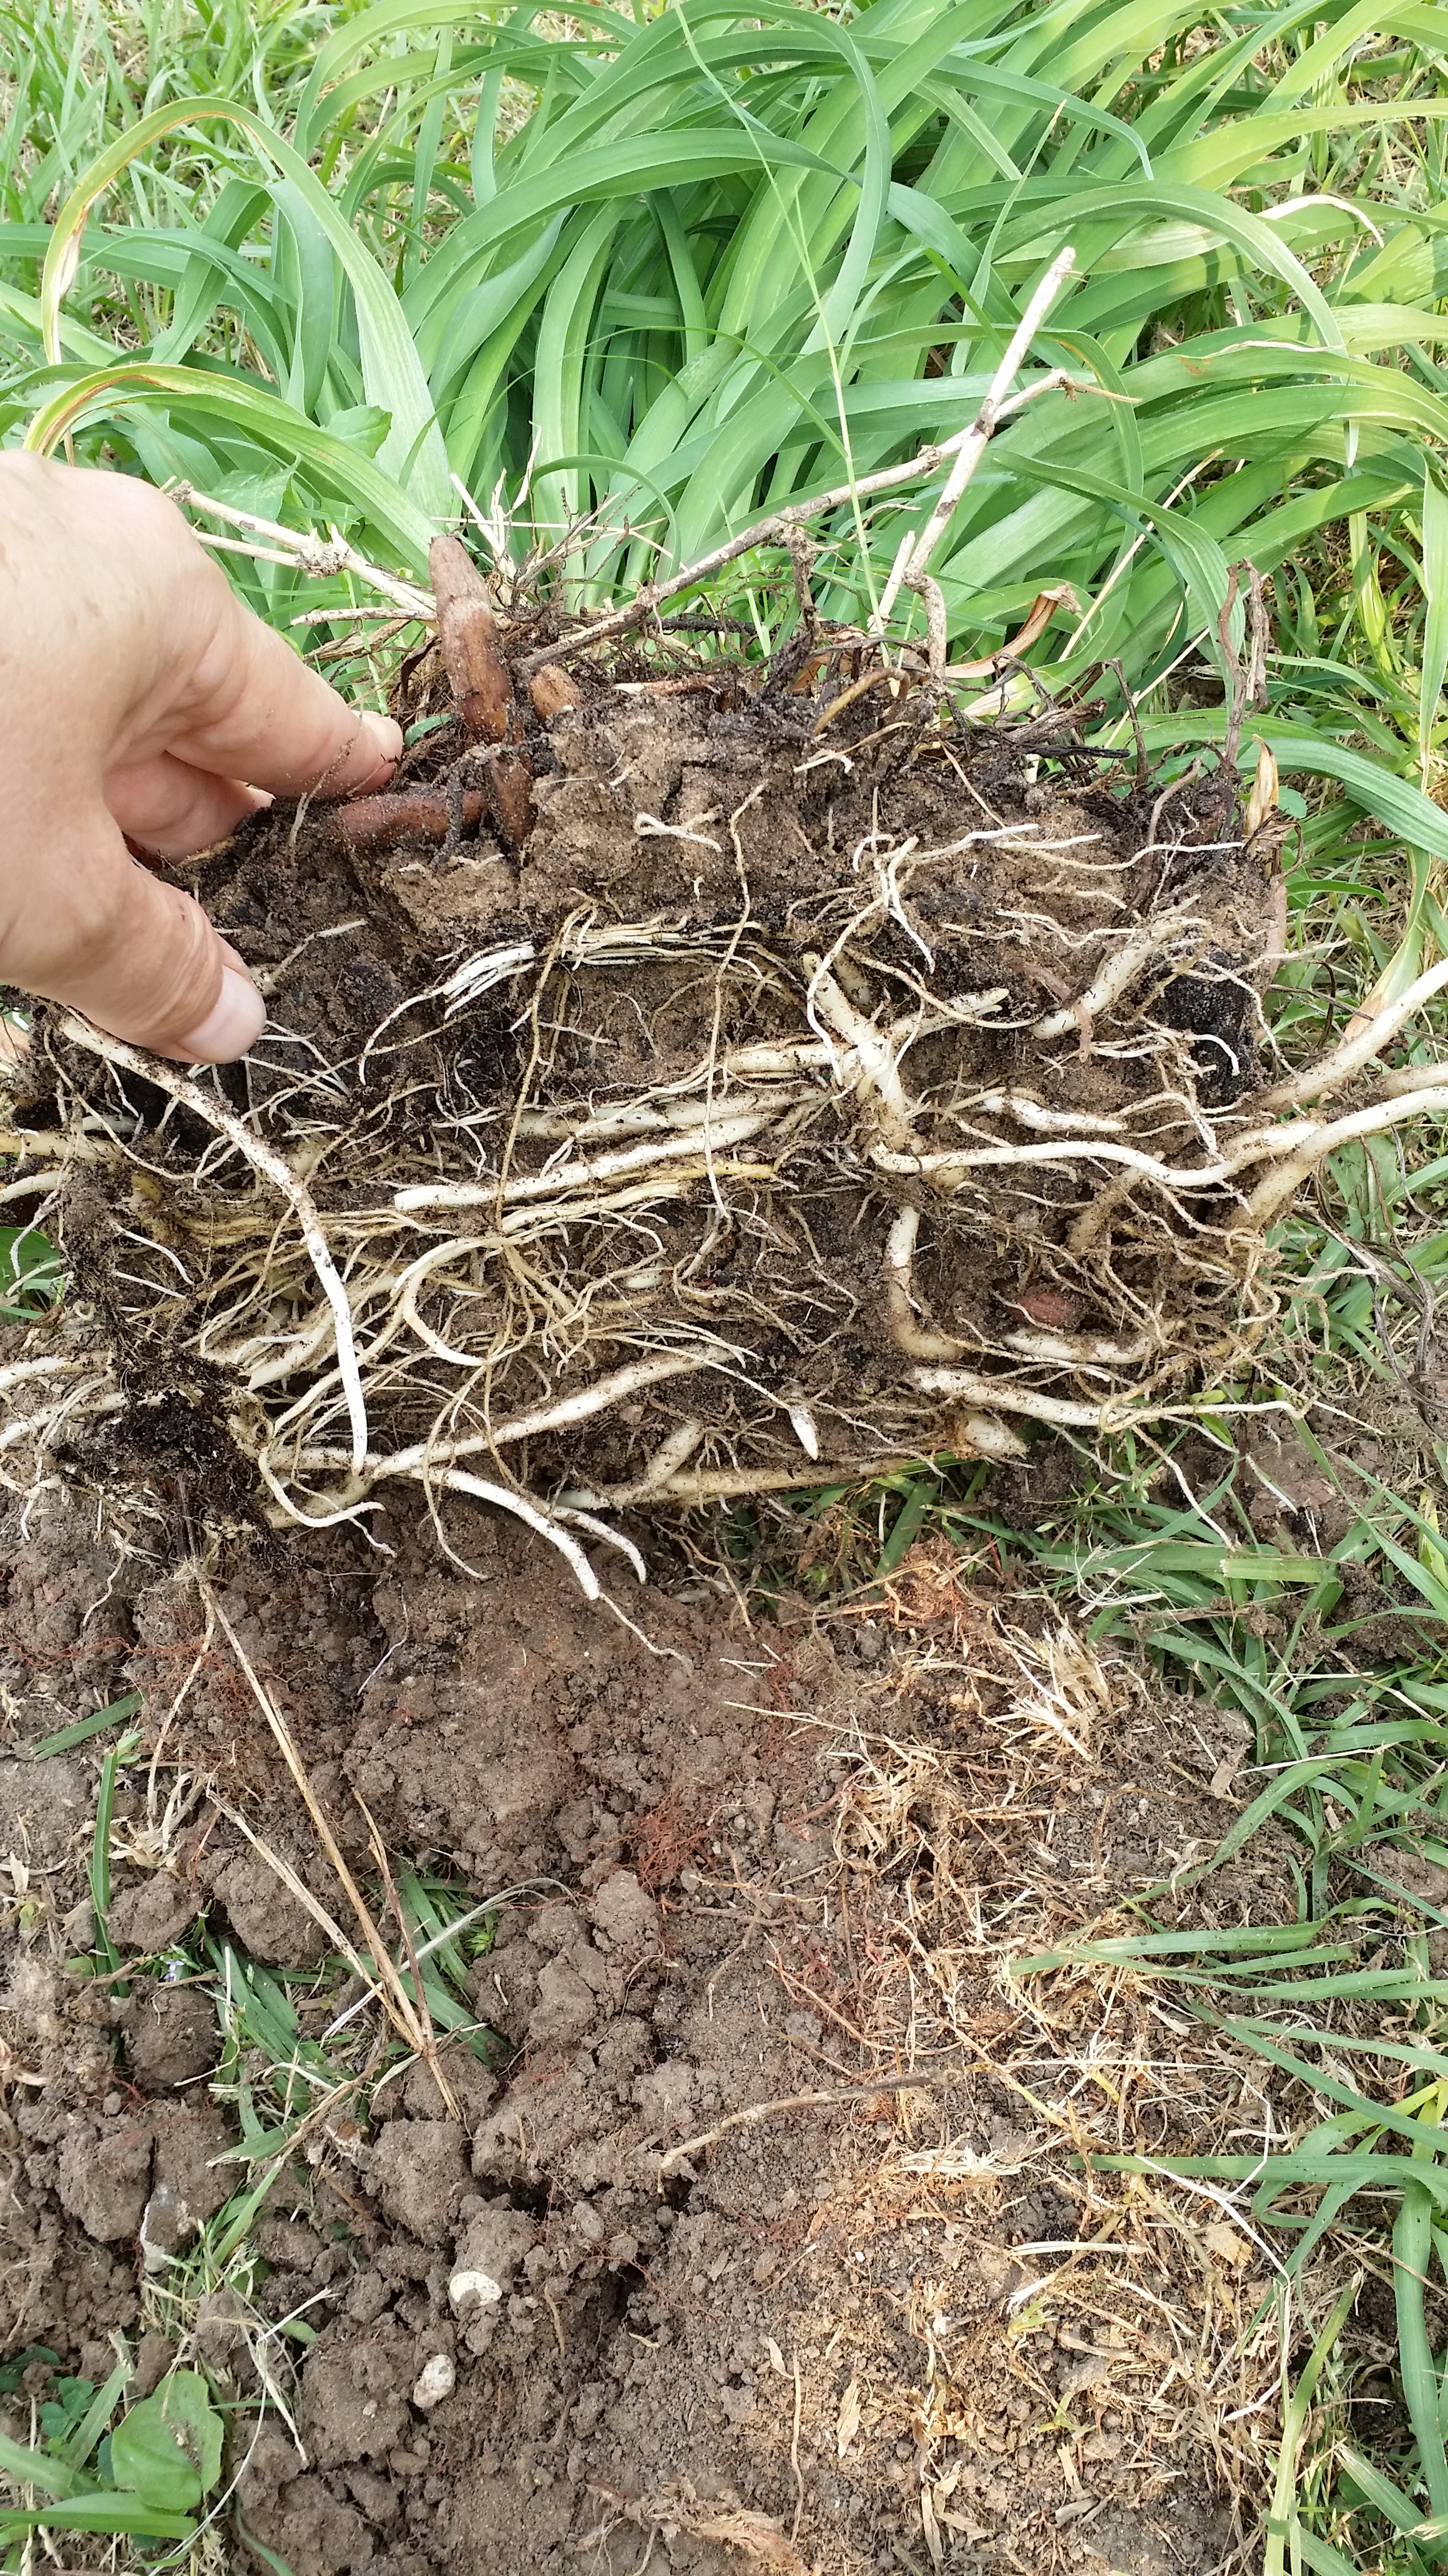
Root and Tuber Health
When preparing to divide, I first check the Root and Tuber Health (see photo, left). There is plenty of white root material observed and this illustrates what we want to see—healthy new root growth. The root system is great, but it also makes the clumps a little more challenging to divide without damaging the plants (less damage results in quicker recovery in the new location).
When daylilies are not divided for more than 4 years, the process of separating out the fans can be brutal (the fans grow very close with roots and tubers are inter-woven throughout), requiring a spade to physically cut plants apart, sometimes resulting in fans separated from the root system.
Before I use a spade, I place one hand on each side (pick any two opposite sides) and then twist the clump and gently test if it can be pulled apart. If it seems to be loosening up, then I continue twisting and turning. Sometimes that is all that is needed—if not, place the spade between fans and press down (damage means more recovery time, does not usually mean plant loss).
Finally, the individual fans are separated out. This is the best time to re-inspect each fan–before planting—to remove grass, sedge, and other weeds. Breaking the clump down to individual fans serves two purposes: 1) more plants to share and 2) removal of persistent grass, sedge and weeds.
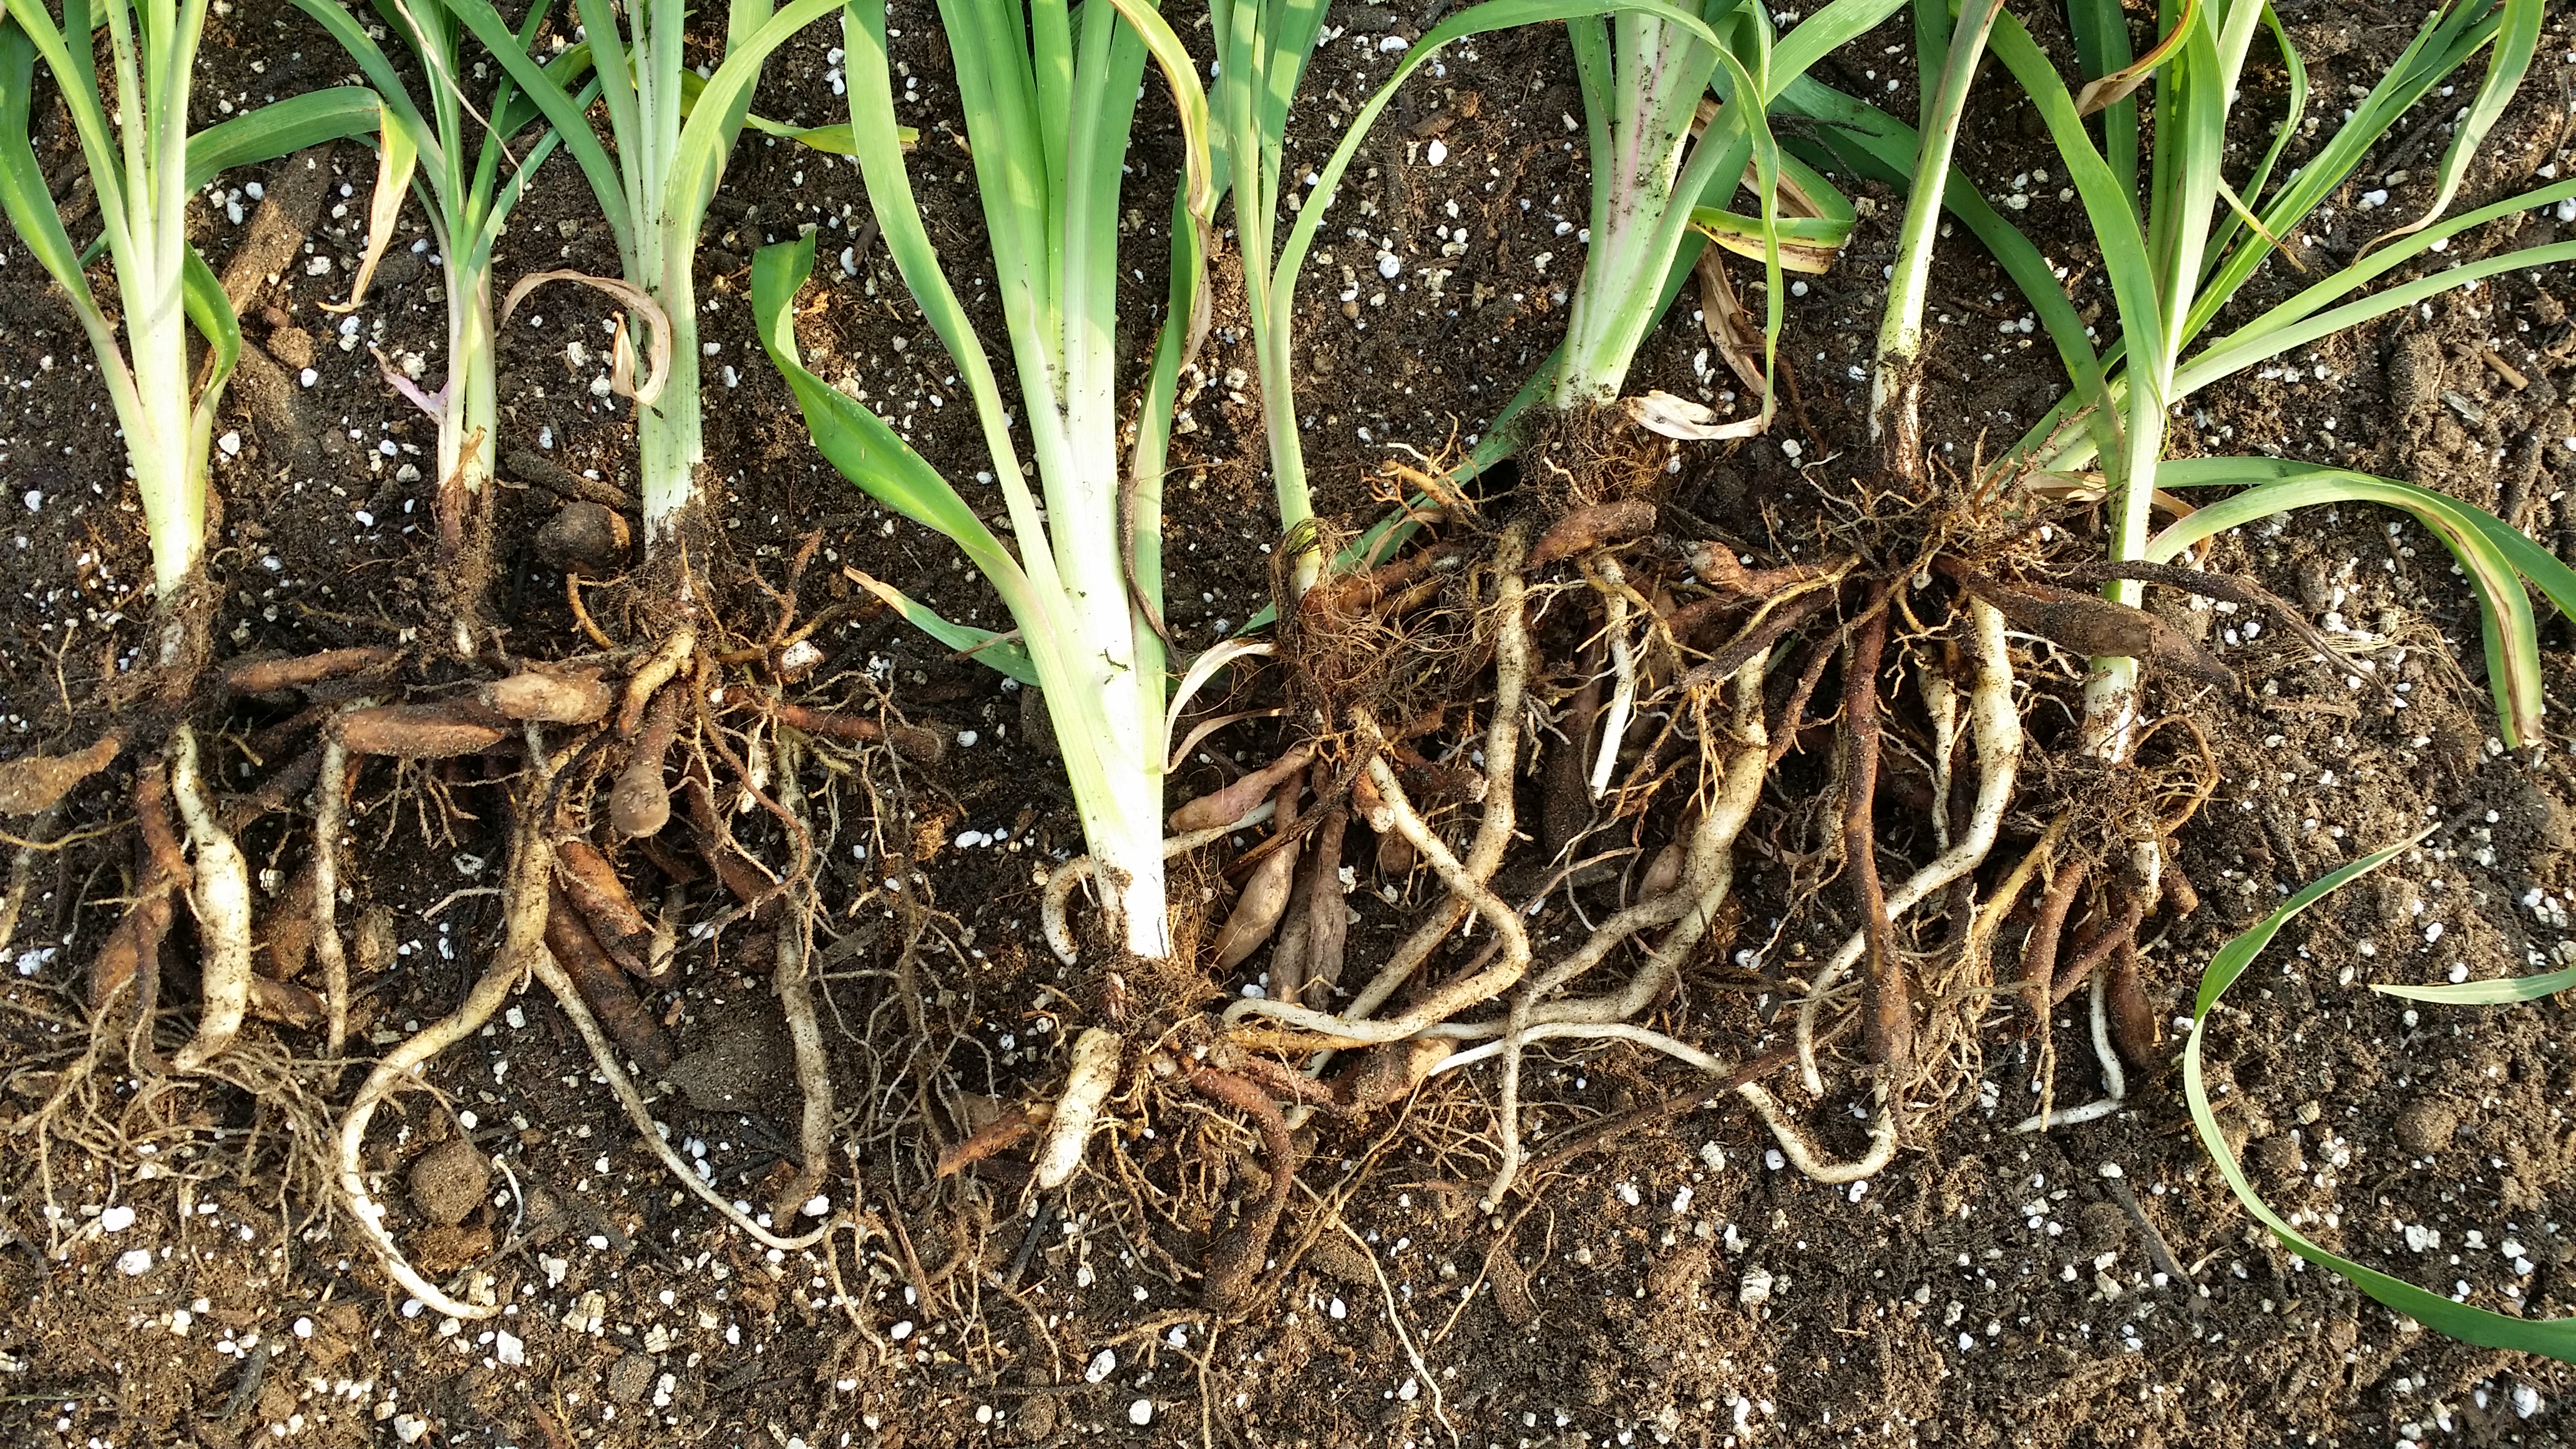
Individual Daylily Fans from Clump
Individual Daylily Fans from a Clump (see photo) should have some tuber material and some healthy root material. The tuber is a plant structure used to store food energy made during photosynthesis — this provides the starting energy when the plant comes out of dormancy, or when an evergreen begins actively growing again in response to warmer temperatures.
When the plant begins actively growing again, we see the development of new roots and tubers below ground and new foliage above ground. Depending on the blooming season, we may also see scapes (those rigid stem-like structures that produce flowers) rising above the new foliage.
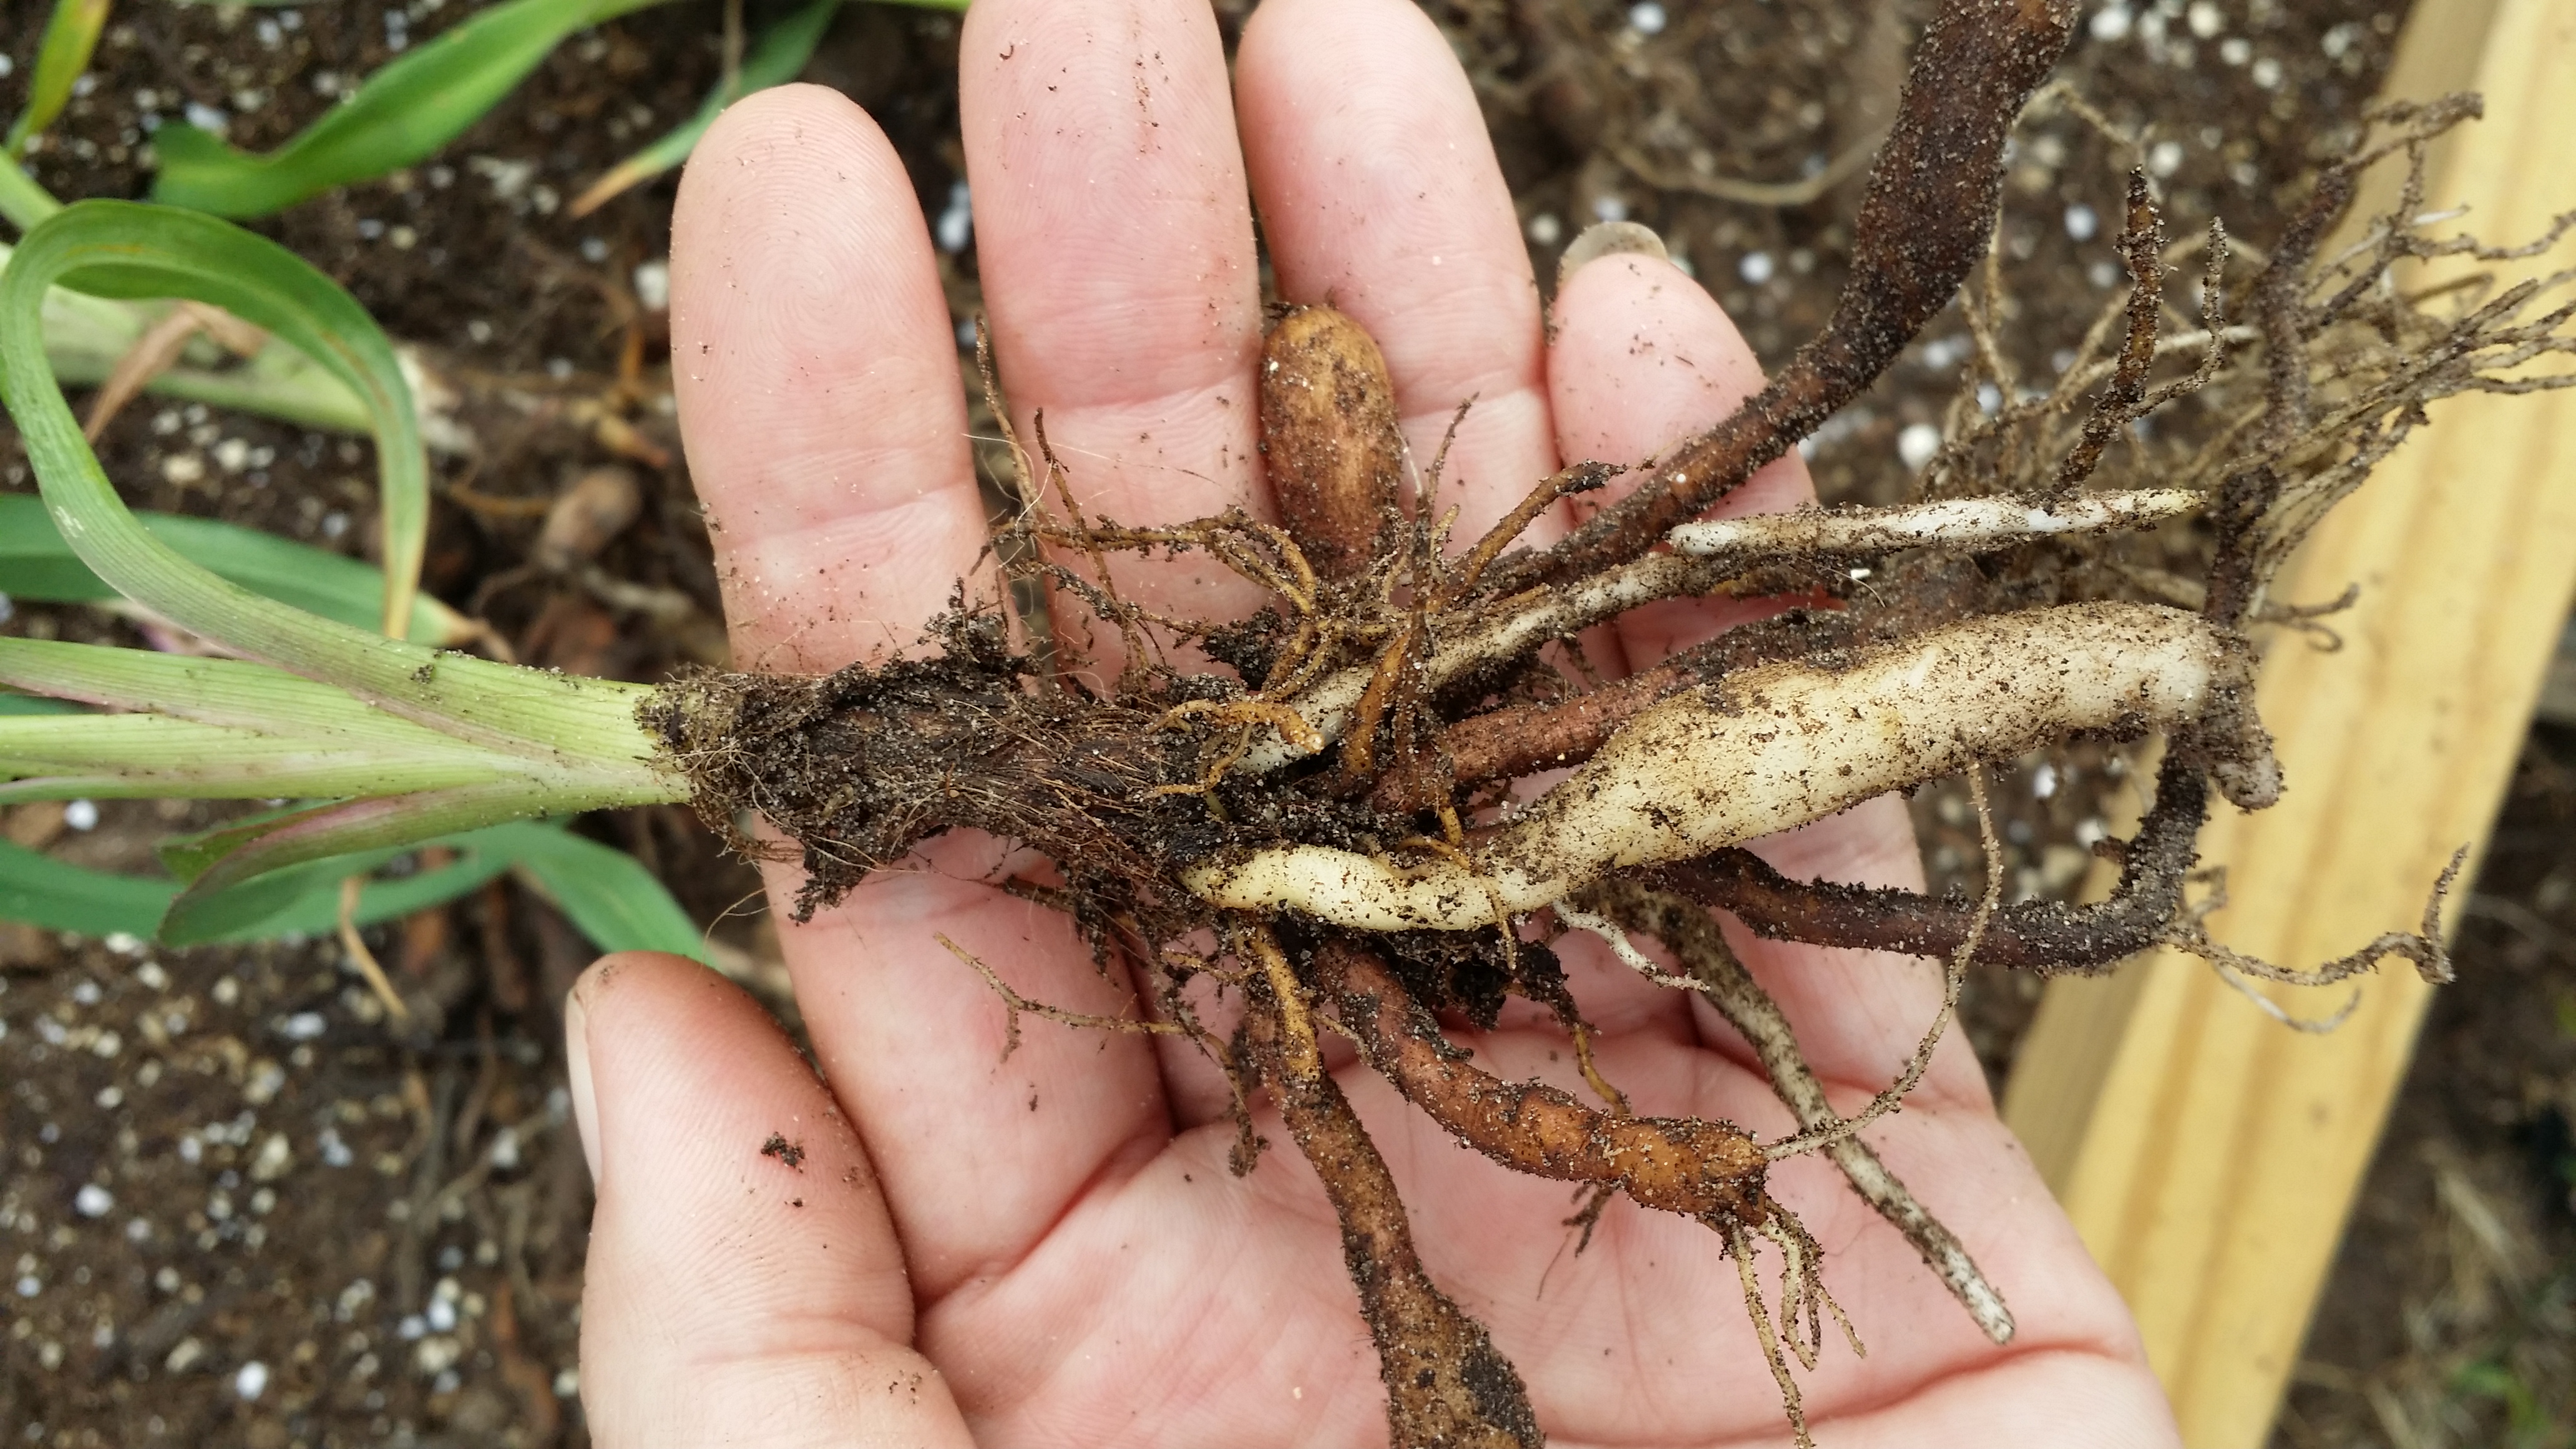
Individual Daylily Fan
Closer inspection of an Individual Daylily Fan (see photo), the new tubers are white and the older tubers are dark orange—sometimes the older tubers will rot and the new tubers are much larger. This fan is ready for planting. (Dig a shallow hole, spread tubers apart, support center of plant by pushing some soil beneath it, then cover with soil and water. The tubers do very well for me with about 1 inch of soil above them.)
There are thousands of daylily varieties readily available. Mine were purchased in 1995, 1997 and 1998—a little care goes a long way! I also have 3 varieties that were given to me as “pass alongs” around 2003 or 2004. They are easy keepers, but need to be weed free and divided every 3 or 4 years–otherwise, they will decline with time.
Daylilies are native to Eurasia and easily adapt to most environments in the United States. In USDA zones 7 and higher, they can be left in the ground over winter—I’m not sure about care in colder zones.
One of my favorite perennials — enjoy!


I knew some of my clumps were not blooiming as much. Guess I need to get out there and thin a bit. Thanks!
It’s amazing how quickly they respond to division. I’m seeing quite a few blooms from the yellow I thought was gone for good—it was building roots and tubers, just needed more space! The blooms are worth the effort 🙂
Pingback: Daylily Propagation by Proliferation | The Art & Science of Gardening