Much going on in the garden now!
Gladiolas make wonderful cut flowers in May and June, but wind, frost, and excessive moisture can cause problems growing these gems!
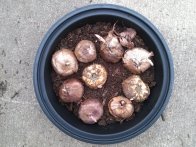
gladiola bulbs in takeout food container
While there are some native gladiolas for this area, I like to have a little more color, so I start mixed color gladiola bulbs early — in takeout food dishes that have been washed.
Here are the steps:
(1) place about 1 inch of potting soil into the plastic dish.
(2) inspect gladiola bulbs; add those with emerging plant material (stems and leaves)

gladiola bulbs, just covered
(3) Add just enough potting soil to cover the bulbs — there may be some emerging plant material above the soil.
(4) water until the potting soil is damp, but not too wet (if pooled water is visible — it’s too wet — drain the excess water. Watch for the protruding plant material to turn green.
Rather than tossing those plastic takeout dishes, save them for starting gladiolas — or other bulbs!
I’ve also used the long, shallow tubs sold for wallpapering (at home improvement stores). They are relatively cheap and you can put quite a few bulbs in them.

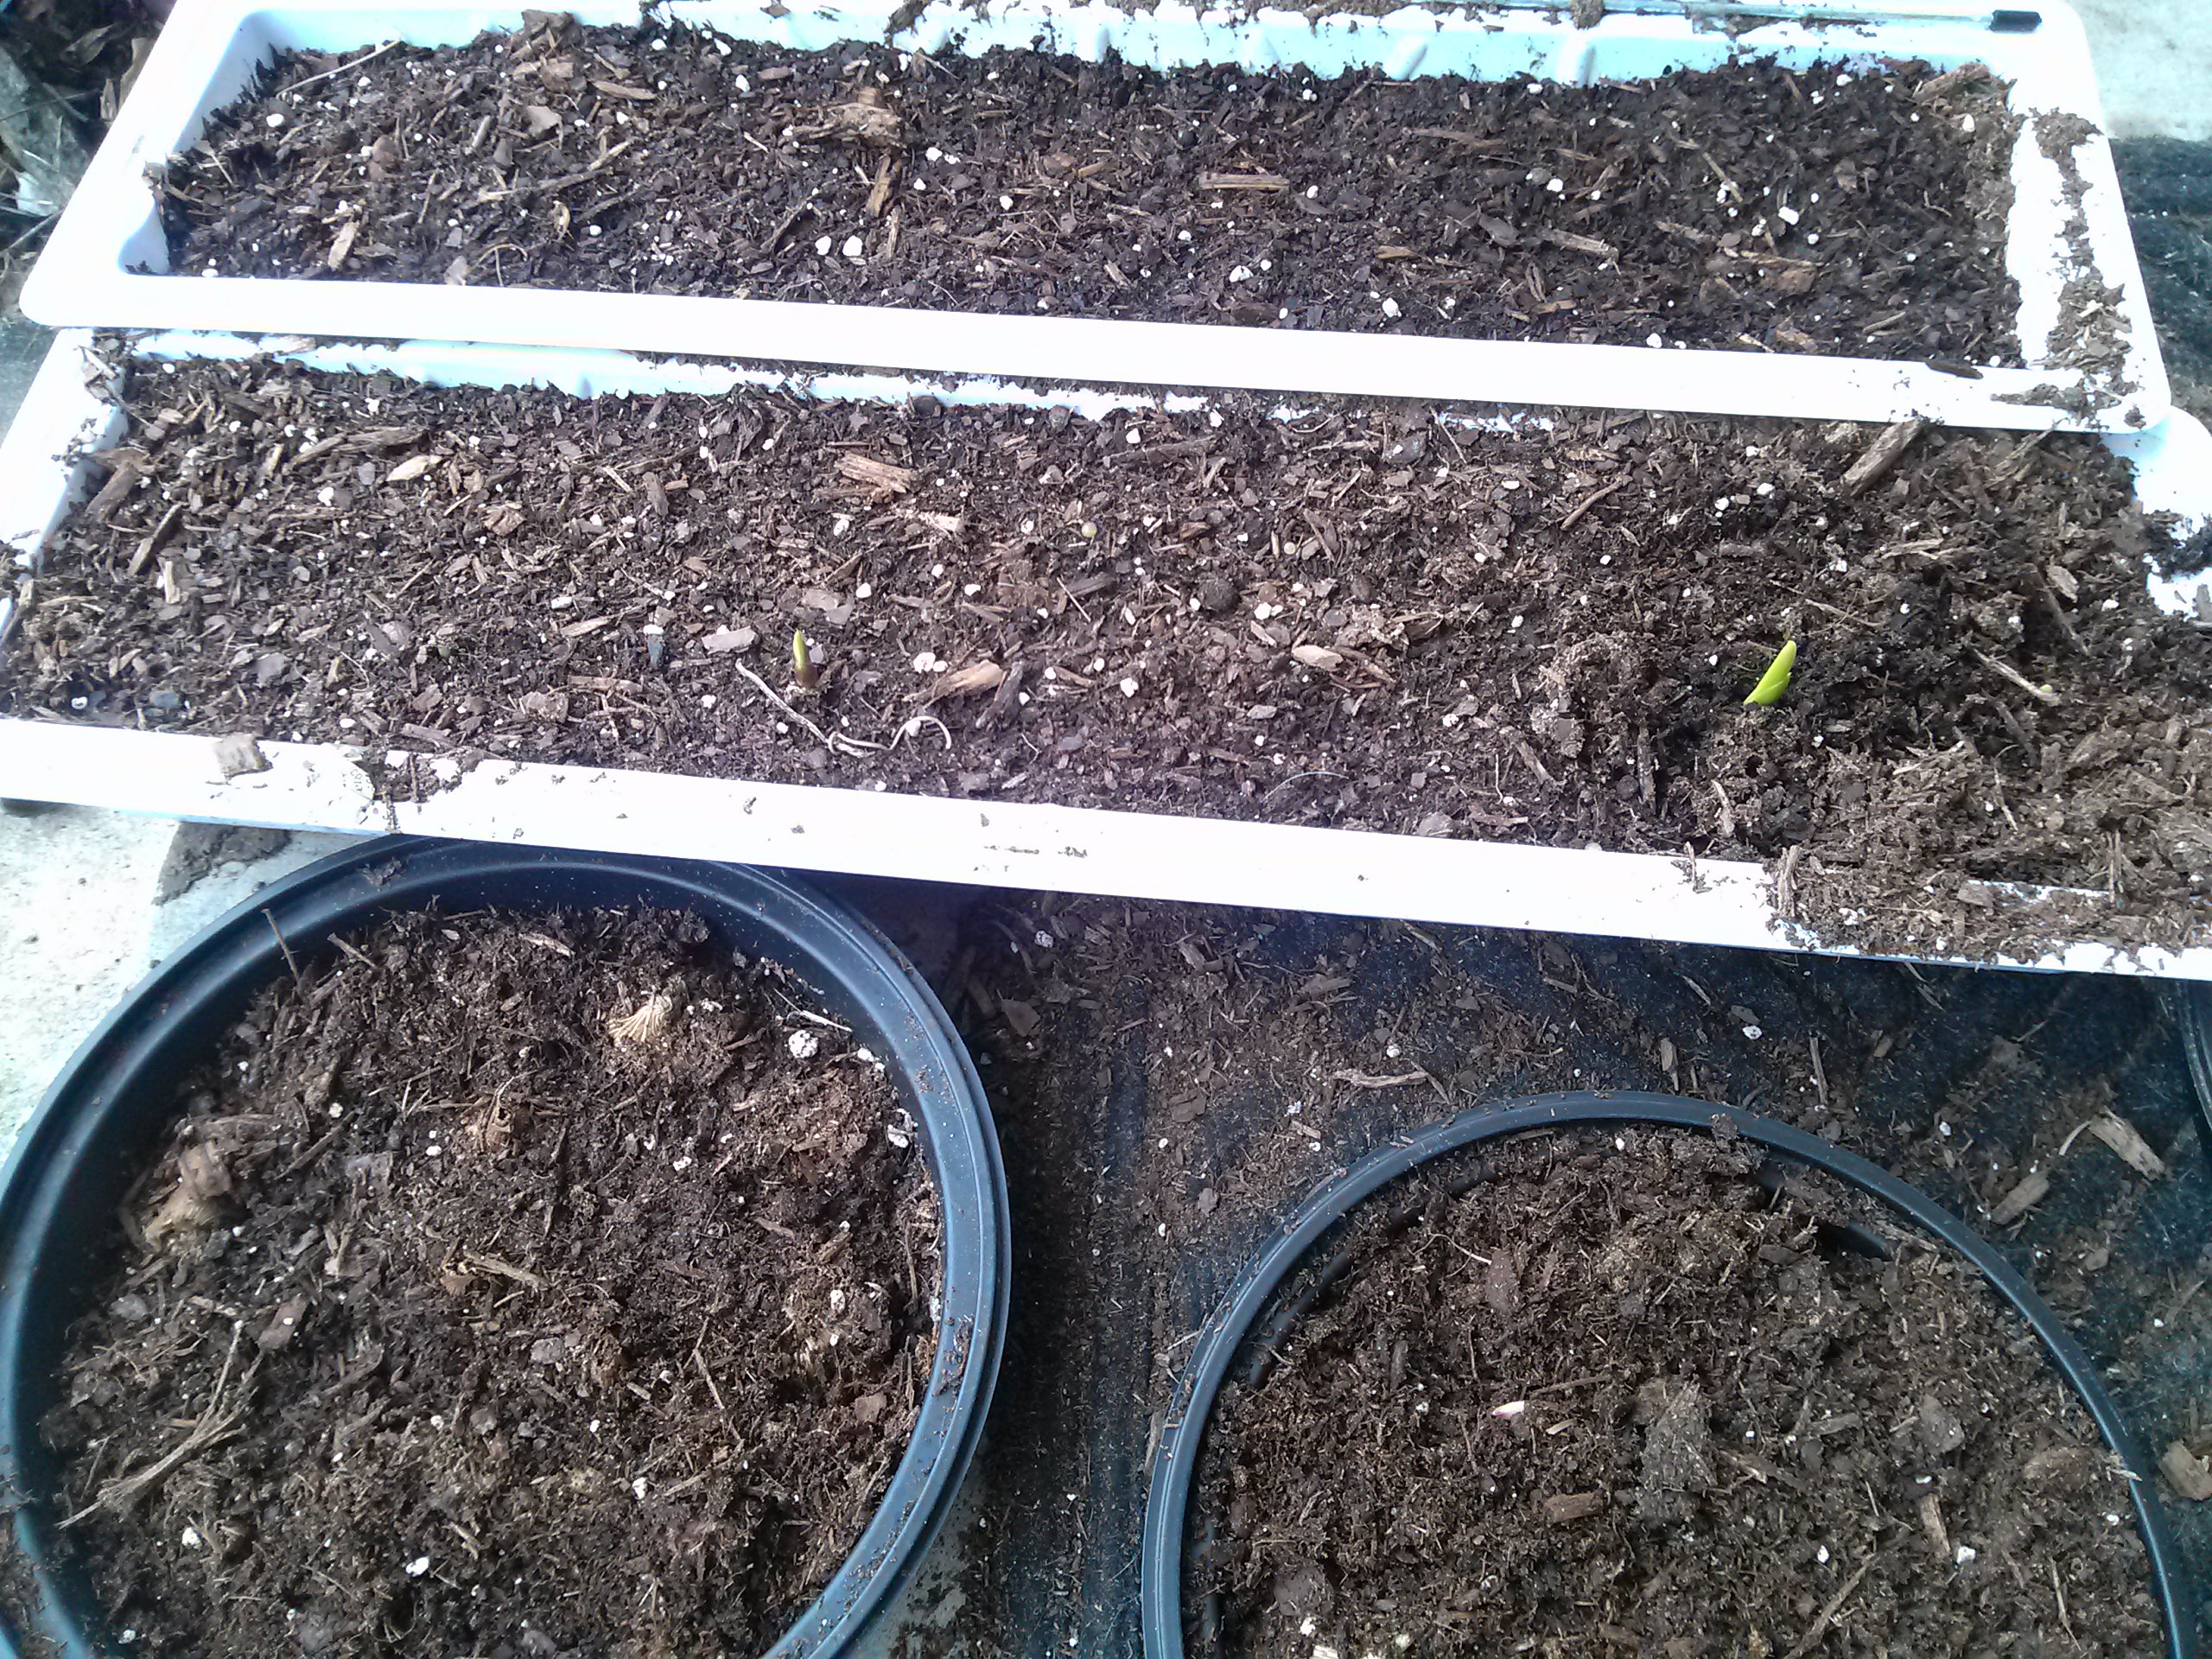
gladiola plants emerging
After about 10 days, the gladiolas have emerged (see long wallpapering container to the left). The transition from off white to green is a great sign! Wait until all danger of frost has passed, then either transplant the bulbs to pots (space plants according to instructions on the box — e.g., 3 inches apart) for fresh picked, long life gladiola flowers in May and June.
Some bulbs may not survive — it always happens that way — no worries, take care of those that do emerge and you’ll have wonderful flowers for late spring or early summer.
Finally — the plants may need support stakes to keep them from falling over.
Enjoy the glads!
PS —- Once finished with the containers, wash and store them for next year. You won’t have to buy containers and these won’t end up in the landfill after a single use!